How to Evaluate Golf Bag Factory Samples for Quality
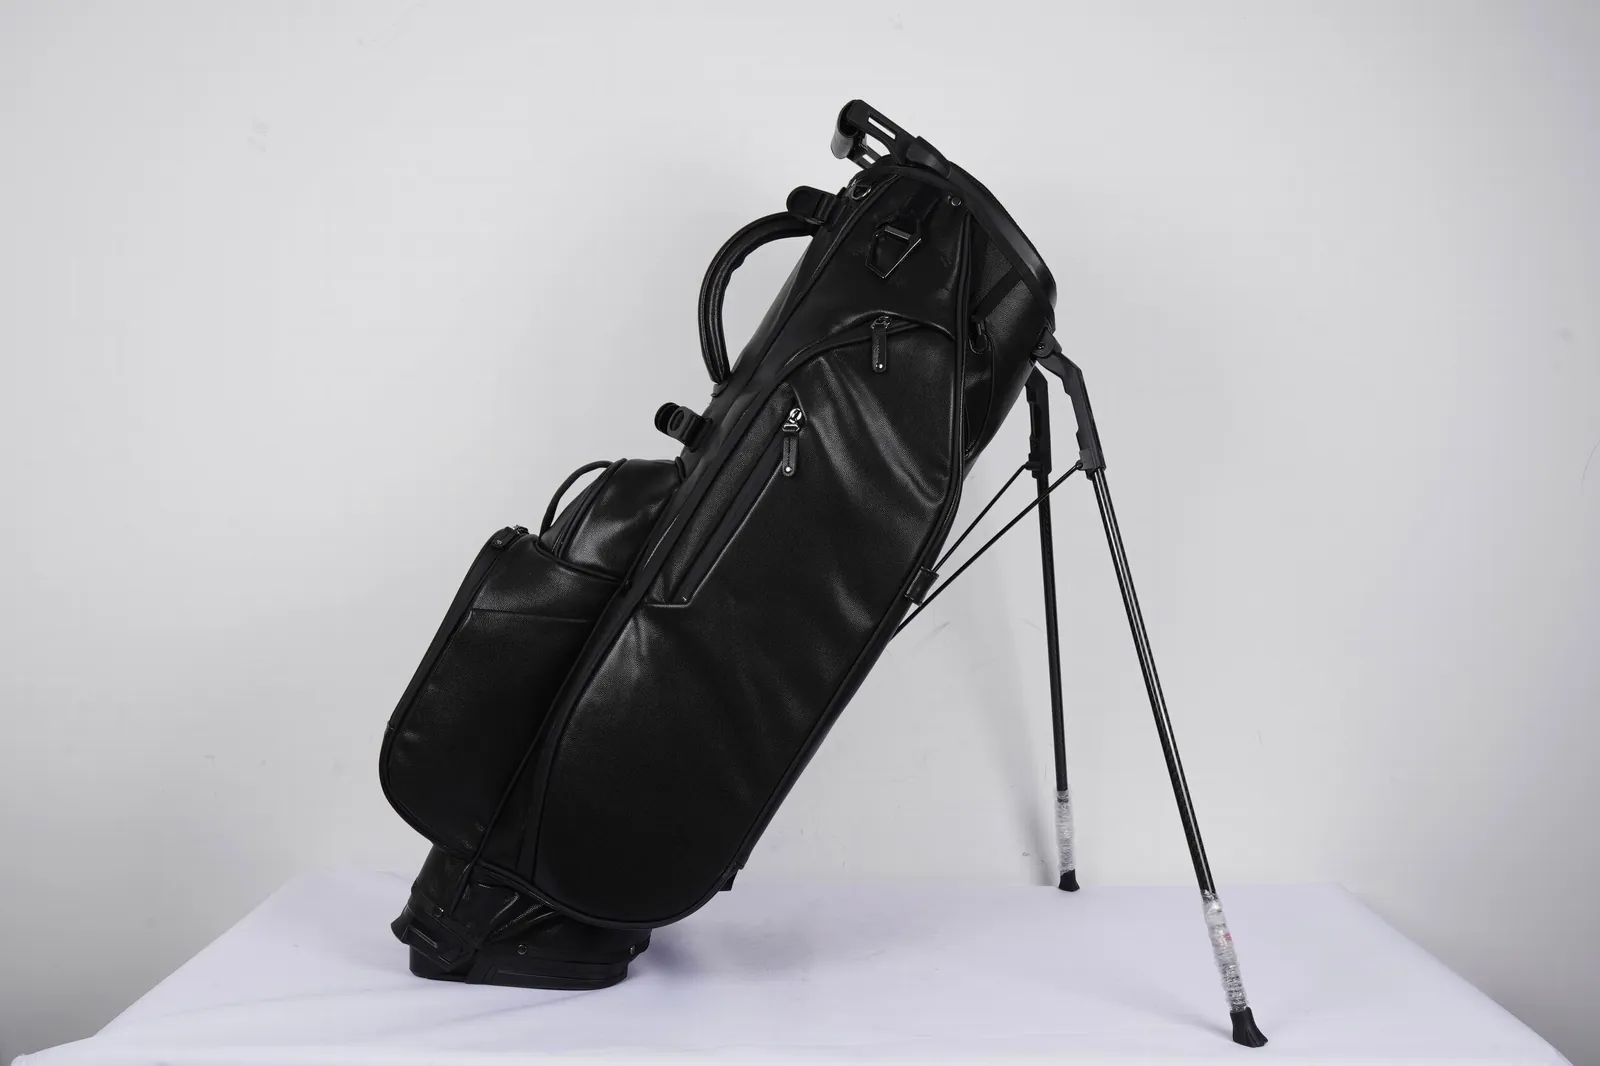
Grading a sample properly is the cheapest hour in the whole programme, because it is the only moment when a buyer can change a bag for the cost of a phone call instead of the cost of a container. The work is unglamorous: measure the parts that nobody photographs, count stitches on the seams that carry the load, cycle the hardware until it either holds or fails, and score the result against thresholds agreed before the sample arrives. On the programmes we run, standard sampling takes 6-10 working days, new moulds push it to 12-15, bulk runs 35-50 days from approval, and the inspection standard that the bulk will be judged against is AQL 2.5 under ISO 2859-1.
Related reading: How to Request Golf Bag Samples Before a Bulk Order
Related reading: Golf Bag Sewing Quality Control: Stitch Count and Seam Inspection
First, Establish Which Sample You Are Holding
Four different objects get called a sample, and they answer different questions. Confusing them is the most common reason a buyer approves something and then receives something else, because the piece on the table was never intended to prove what the buyer assumed it proved.
| Sample type | Made from | What it proves | What it cannot prove |
|---|---|---|---|
| Development sample | Stock fabric, hand-cut pattern | Shape, proportion, pocket layout | Weight, tolerance, production construction |
| Sales sample | Production run for a stock line | Finish and colour story | Your specification, your logo |
| Pre-production (PP) sample | Bulk fabric, bulk trim, production dies | Everything the bulk will be | Nothing, if it is built on the line it will be built on |
| Sealed or golden sample | Signed PP sample, held by both sides | The reference for future claims | Anything after the fabric lot changes |
A development sample is a design conversation. A PP sample is a contract. Reviewing a development sample with a caliper and rejecting it for being 80 g heavy wastes everybody time, because hand-cut parts and stock fabric cannot hit a production weight. Reviewing a PP sample by eye and approving it on a photograph wastes something far more expensive.
Ask which one is being sent, and ask what it was built from, before it ships. A supplier who answers with the fabric lot number, the trim supplier and the name of the line it was built on is a supplier who understands the question.
The Bench Audit: Thirty Minutes, Six Stations
A structured audit beats an hour of handling. Set the bag on a bench under daylight-balanced light, put a notebook and a steel tape beside it, and work through the six stations in the same order every time so results are comparable between suppliers and between seasons.
- Sight and smell. Look down the top opening, along every seam, into every pocket. Smell the interior: a solvent or fishy odour signals adhesive or coating that has not cured, and it will be worse in a sealed container.
- Dimensions. Take the ten measurements on the sheet below. Record actual values, not pass or fail, because a trend across two samples is more informative than a single reading.
- Weight. Weigh the empty bag to the nearest 5 g on a digital scale. Compare against the target, and compare against the previous sample if there is one.
- Stitch count. Count stitches over a 25 mm span on each load-bearing seam with a thread counter, in three places per seam, and average.
- Hardware and mechanism. Open and close every zip, buckle and clip. Deploy the legs twenty times, listening for the hinge. Load the bag with 12 kg and carry it for a kilometre.
- Colour and print. Judge the shell, trim and logo against the approved standard under the light source named in the specification, not under the office ceiling.
Photograph the six stations as you go, with the measurement sheet in frame. The resulting file becomes the reference for the bulk inspection, and it settles most arguments about what the sample looked like before it was shipped.
Bench note. Weigh the sample before anyone presses or steams it. A bag that has been dressed for photography can measure 20-40 g heavier from retained moisture, and that is enough to make a compliant bag look out of tolerance in a review.
Measurements That Reveal the Process, Not the Sample
The purpose of measuring a sample is not to certify one bag. It is to infer whether the process behind it can repeat. A dimension that sits mid-tolerance tells you very little. A dimension that sits at the edge, or that has clearly been adjusted after assembly, tells you where the line is struggling.
| Checkpoint | Tolerance | Instrument | Why it is measured |
|---|---|---|---|
| Overall height | ±5 mm | Steel tape | Cart fit, cover fit, retail shelf consistency |
| Top opening oval | ±2 mm both axes | Caliper or gauge block | Trolley cradle, divider seating |
| Divider wall position | ±1.5 mm on moulded inserts, ±3 mm on sewn walls | Caliper | Club clearance between wells |
| Base flatness | ≤2 mm rock on a flat plate | Feeler gauge | Stability on a trolley or a floor |
| Finished weight | ±3% of target or ±60 g | Digital scale | Weight claims, freight calculation |
| Pocket opening width | ±3 mm | Tape | Zip strain, hand access |
| Shoulder strap length | ±10 mm | Tape | Carry position, strap hardware load |
| Stitch density | 9-11 per inch (35-43 per dm) | Thread counter | Seam strength and pucker risk |
| Logo position | ±3 mm from stated datum | Tape from seam | Visual consistency across a lot |
Two of these are worth arguing about at sample stage and not later. Base flatness decides whether the bag rocks on a trolley, which is a complaint the retailer hears immediately and cannot fix. Strap length decides where the bag hangs on the shoulder, and a 15 mm error is the difference between a bag that carries well and one that swings against the hip.
Weight is the measurement buyers most often take and least often interpret. A 30 g overrun on a 2.2 kg cart bag is noise. A 30 g overrun on a 1.5 kg carry target is a specification miss, because at that weight every gram is a decision someone made in the frame or the divider.
Record every value against the number written in the tech pack, which is the only document that can settle a later disagreement. If the pack states a height and no tolerance, the review is the moment to add one, and the tech pack reading guide shows which fields matter most on a bag specification.
Seams and Stitch Density Under Load
What to count and where
Count on the five seams that carry load: the top collar to body, the base to body, the strap anchors, the pocket top where a zip is set, and the leg hinge mount. Nine to eleven stitches per inch is the working range for 600D polyester with a bonded nylon thread. Below eight the seam is loose and will grin under load. Above twelve the needle perforates the fabric faster than the thread fills the holes, which weakens the panel rather than strengthening the seam.
The details that separate a good sample from a lucky one
Look for a backstitch or a bar-tack at every seam end, not just on the visible ones. Check the thread colour inside the pocket against the outside: a mismatch means a spool change mid-panel and a risk of shade banding in bulk. Run a fingernail along the inside of the base seam and feel for a raw edge, because an unfinished edge that is hidden at sample stage becomes a fray point at month eight.
Then pull. A hand pull on a strap anchor will not replicate a 250 N grab test, but it will find the seam that was only stitched to the lining. If the sample survives a firm two-handed pull at every anchor point without stitch distortion, the construction is in the right family and the destructive test will confirm it.
Hardware, Zippers and the Mechanisms
Hardware is where a sample most often differs from bulk, because sample rooms keep a drawer of good parts. Ask for the hardware to be identified by supplier and part number on the sample tag, then check that the bulk order names the same part in writing.
Sample-room parts against the bulk bill of materials
A sample tag that lists supplier and part number is worth more than a photograph. Without it, a bulk order can arrive with a visually identical buckle that has a 40% lower gate strength, and nobody discovers the substitution until a strap fails. Photograph the tag alongside the hardware and file it with the approval.
- Zipper gauge and slider. A #8 coil on the main compartment and #5 on pockets is normal; a #5 on the main opening will strain under a loaded pocket. Cycle the main zip twenty times with the pocket half full and listen for the slider skipping teeth at the curve.
- Buckles and adjusters. Load-bearing buckles should be moulded acetal or nylon, not styrene. Flex the female half and look for stress whitening at the gate.
- Leg mechanism. Deploy and retract twenty times. The legs should reach full extension without a shove, and the hinge should return without a rattle. Check the wire ends for burrs and the hinge pin for end-float.
- Base and feet. Push the bag across a concrete floor for ten metres. A base that scuffs through to the board at sample stage will scuff through in the first month of retail.
- Strap and pad attachment. Confirm the webbing is bar-tacked to the bag rather than sewn through a single layer of shell fabric.
For a waterproof programme, this is also the moment to check that the zip is a coated or water-resistant type and that the storm flap actually covers the slider, not merely the tape. A sample can be built with a flap that photographs well and seals nothing.
Colour Judgement Under the Right Light
Colour is the most disputed property in any sample review and the least expensive to get right and wrong in the same breath. Judge it against a physical standard, under a defined light source, with the two surfaces touching. A monitor, a phone photograph and a memory are not standards.
The convention that works is judgement under a daylight simulator at 6,000-6,500 K, with a second look under a warm domestic lamp because that is where the product will actually live. A tolerance of 1.0 ΔE inside one lot, 1.5 against the standard, is normal commercial practice for piece-dyed polyester. Anything above that is visible on a shelf.
Matching trim to shell is harder than matching shell to standard, because PU trim and 600D polyester age differently. Approve the pair together, not separately, and note which of the two is the reference. Where the trim is a contrast colour, ask for the light fastness result: grade 4 or better to ISO 105-B02 is the floor for anything that will sit in a car or a cart for a season.
Destructive Tests Worth Spending a Bag On
Non-destructive review can be passed by a well-made sample. Destructive testing is what tells you whether the specification has been met rather than approached. Budget four to six bags for a first approval, and expect two of them to be sacrificed to seams alone.
| Test | Method | Acceptance | Bags consumed |
|---|---|---|---|
| Seam grab strength | ASTM D5034 on five load seams | 250 N minimum, no slip | 2 |
| Tear strength | ASTM D2261 tongue method on shell fabric | 30 N minimum | 1 |
| Zipper cycling | 5,000 cycles at 3 kg pocket load | No skip, no slider loss | 1 |
| Leg mechanism cycling | 5,000 deploy and retract cycles at 6 kg top load | Full extension, no play | 1 |
| Drop test | 1 m onto base, three orientations, packed | No seam failure, base intact | 1 |
| Colour fastness | ISO 105-B02 to artificial light | Grade 4 or better | Swatch only |
The order matters. Run the seam tests first, because a set of seams that fails at 180 N makes the remaining tests a formality. Run the mechanism and zipper cycling last, since those tests take the longest and you want them running while the rest of the review happens.
Keep the tested units. A failed bag with the test tag attached is the most persuasive document in a conversation about a second order, in either direction.
Scoring the Sample and Writing the Approval
A score turns a set of opinions into a decision that a colleague can audit six months later. Set the weights before the sample arrives, so the weighting cannot be adjusted to rescue a disappointing bag.
| Section | Weight | Minimum to pass |
|---|---|---|
| Construction and seams | 25% | 70 |
| Dimensions and weight | 20% | 70 |
| Hardware and mechanisms | 20% | 70 |
| Materials and colour | 15% | 70 |
| Function under load, 12 kg plus 1 km carry | 10% | 70 |
| Labels, packaging and paperwork | 10% | 80 |
A workable rule is an overall score of 85 or better with no single section below 70. That combination prevents a beautiful bag with a weak hinge from passing on the strength of its appearance, which is exactly how most bad approvals happen. Write the approval as either approved, approved with a listed correction, or rejected with reasons that reference the failed checkpoint.
Write the approval as a document, not a message
An approval sent as a chat message is not an approval. Put the score, the measured values, the photographs, the test report and the list of corrections into one dated file, and have both sides sign it. Where a correction is accepted, state when the corrected piece will be reviewed and who pays for the second courier.
Then seal the approved piece. Sign across the seal, date it, attach the measurement sheet and the test report, and photograph all faces in daylight. That object is the reference for bulk inspection and for any warranty conversation in the following 30 months. The process around it is described on the sampling page.
Traps That Make a Sample Better Than the Bulk
Most samples that disappoint are not dishonest. They are built the way a sample room builds things, and the gap between a sample room and a production line is where the disappointment lives. Six patterns account for most of it.
- Hand-cut parts. A pattern cut with a blade can be 2 mm more generous on every edge than a production die. Ask whether the sample was cut on the production die and mark the answer.
- Built by the best operator. Sample rooms are staffed by the most experienced people on site. A first-article review on the line is a better predictor than a perfect sample.
- Different material lot. Trim and shell pulled from a stock bin are from a different dye lot than bulk. Ask for the lot number and the colour reading.
- Pressed before photographing. Steam and a press hide puckering that returns after a week in a carton.
- Trimmed twice. Sample operators cut thread ends and clean edges a second time. Production does it once.
- No packaging constraint. A sample never has to fold into a carton with 19 others, so a rigid collar can pass review and then crush in transit.
The countermeasure is simple and cheap: review the first article off the production line, not only the sample room piece. A 30-minute review at the start of bulk catches more than an hour of measurement three weeks earlier. That is the same principle behind the quality standards guide and the reason a first-article check sits on the production schedule rather than on the sample schedule.
One structural point closes the loop. A sample is only comparable to bulk if it was made from the same drawings, dies and material lots, so the approval file should state all three. Since 2014 the programmes run from Quanzhou have been built on that assumption, with a team whose experience in bag production reaches back to 2004, and the review sheets travel with the order rather than staying in an office.
Next steps: custom solutions, manufacturing capability, and a quotation request. OEM/ODM sampling. Quality standards guide.
Sources and Standards Referenced
- ISO 2859-1:2022 Sampling procedures for inspection by attributes
- ASTM D5034 Breaking strength and elongation of textile fabrics (grab test)
- ASTM D2261 Tearing strength of fabrics (tongue method)
- ISO 105-B02 Colour fastness to artificial light
- ISO 9001 Quality management systems, requirements
Frequently Asked Questions
What should I check first on a golf bag sample?
Establish which sample it is, then check the six load-bearing seams and the base flatness before anything cosmetic. Construction and stability decide whether the bag survives a season; colour and trim decide whether it sells. Reviewing in that order also means the expensive questions are answered before the cheap ones are debated.
How many samples should I ask for at approval?
Ask for three pieces from the approved pre-production run. One is measured and photographed in full, one is sacrificed to destructive testing, and one is sealed as the reference. Budget four to six bags in total for a first approval, because seam testing alone consumes two.
What tolerances are normal on a golf bag?
Overall height within 5 mm, top opening oval within 2 mm on both axes, base flatness within 2 mm of rock, finished weight within 3% or 60 g, and stitch density between 9 and 11 per inch. Divider wall position is tighter on a moulded insert, at 1.5 mm, than on a sewn one at 3 mm.
How do I check stitch density properly?
Use a thread counter over a 25 mm span, count in three places on each load-bearing seam, and average. Nine to eleven stitches per inch is the range for 600D polyester with bonded nylon thread. Above twelve the needle perforates the fabric faster than the thread fills the holes, which weakens the panel.
What seam strength should a golf bag hold?
A 250 N minimum on a grab test to ASTM D5034, measured on the five load-bearing seams, with no stitch slip. Below about 180 N the seam is a warranty event waiting for a full bag. Test the seams first, because a failure there makes the rest of the review academic.
How many cycles should a zipper survive?
5,000 cycles at a 3 kg pocket load with no tooth skipping and no slider loss is a reasonable acceptance value for a main compartment zip. Use a #8 coil on the main opening and #5 on pockets, and cycle the main zip by hand at sample stage with the pocket half full.
How should colour be judged on a sample?
Against a physical standard, under a daylight simulator at 6,000-6,500 K, with the surfaces touching. A spread of 1.0 ΔE inside a lot, 1.5 against the standard, is normal for piece-dyed polyester. Check the same pair again under a warm domestic lamp, because that is where the bag will live.
Should I cut a sample open to inspect it?
Yes, on one unit. Cut along the lining at the base and at one pocket to see the seam allowance, the bar-tacks and whether the base board is the specified grade. It is the only way to confirm that the construction inside matches the construction described in the tech pack.
What is a PP sample and why does it matter?
A pre-production sample built from bulk fabric, bulk trim and the production dies, on the line that will make the order. It is the only sample that can predict bulk behaviour. A development sample proves shape; a PP sample proves everything the container will contain, which is why approval should be given on the PP piece alone.
Why did the bulk not match the approved sample?
Usually one of six reasons: hand-cut parts, a sample built by the most experienced operator, a different material lot, pressing before photography, double trimming of thread ends, or no packaging constraint. The fix is to review the first article off the production line, not just the sample room piece.
How long should a sample review take?
Thirty minutes for the bench audit across six stations, plus the time for destructive tests, which run for a day or two. A sample needs six to ten working days normally, and twelve to fifteen once a fresh mould is in the picture. Reviewing within 48 hours of receipt keeps the bulk start date intact.
What score should a sample need to pass?
An overall score of 85 or better with no section below 70, on a weighted rubric covering construction, dimensions, hardware, materials, function under load, and paperwork. The floor on each section is what prevents a good-looking bag with a weak hinge from passing on appearance alone.
Send a Sample for Review
Ship the sample with its measurement sheet, and a scored review with the failed checkpoints and the correction list comes back within three working days.
Book a Sample Review See Sampling Options