Golf Bag Sewing Quality Control: Stitch Count and Seam Inspection
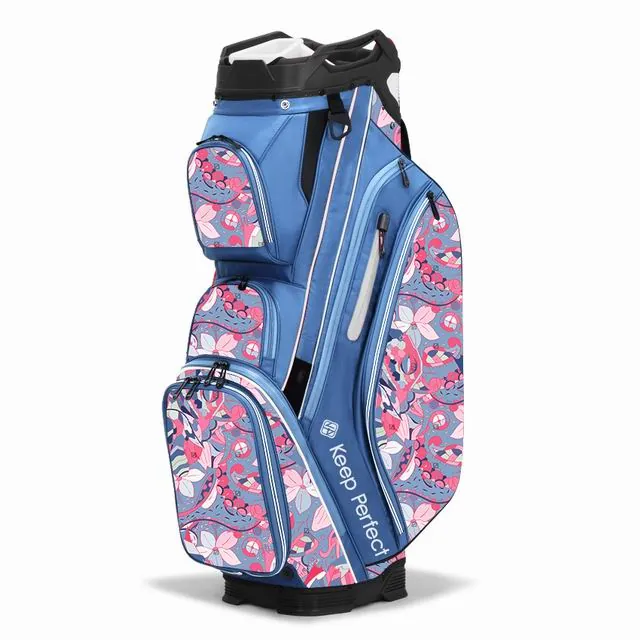
Most seam failures on a golf bag start with a number that was never written down. Stitch density, thread size and needle type are usually decided on the sample by whoever runs the machine that day, then carried into bulk by habit. Six months later a strap anchor opens on a loaded bag and nobody can say whether the seam was ever specified at all. Stitch count is not a matter of operator preference; it is a strength variable that can be measured, written into the tech pack and inspected at the end of the line. This article sets out the numbers worth specifying, where seams actually fail, and how to run in-process checks that catch a drifting machine before it produces a thousand bags. The programme minimum is 200 pieces per colourway, sampling absorbs 6-10 working days, bulk sewing 35-50 days, and each lot is sampled to AQL 2.5 following ISO 2859-1.
Why Stitch Density Is a Specification, Not a Preference
A lockstitch seam holds two pieces of cloth together by trapping them between an upper and a lower thread. The load is carried by the thread and transferred to the fabric at each penetration point. Increase the number of penetrations per inch and the load per stitch falls, which sounds like an improvement until the fabric itself becomes the weak link: every needle makes a hole, and a dense seam turns the seam line into a perforated tear strip. Decrease the count and each stitch carries more load, the thread elongates, and the seam gaps open under tension. There is a window where seam strength peaks, and it sits between roughly 7 and 10 stitches per inch on the woven polyester used in bag bodies.
That window shifts with the material. On 600D polyester, 8 stitches per inch with a T70 bonded thread gives a seam efficiency of about 80-85% of the fabric strength. Push to 12 per inch on the same cloth and efficiency falls, because the needle has cut too much yarn. On a lightweight 300D lining, 10-12 per inch is appropriate because the fabric is thin and the thread is finer. On a 1680D base panel joined to a body, 6-7 per inch with a heavier thread is the right answer, because the material is thick, the stitch length needs to span the weave, and a tight seam would simply crush the base edge.
The practical consequence is that a single SPI number for the whole bag is wrong in both directions. A tech pack should carry a table of seam positions with a stitch length, a thread size and a needle size for each one. That table is the document the line supervisor works from, and it is also the document that settles a claim.
Related reading: Golf Bag Stand Leg Mechanism: Engineering and Testing
The Numbers That Belong in a Tech Pack
Four parameters control almost everything a sewing line can get wrong, and all four are cheap to specify.
Stitch length and stitches per inch
Stitch length is quoted in millimetres per stitch on metric machines and in stitches per inch on older imperial equipment, and the two are easy to confuse. A 3.5 mm stitch length is 7.3 stitches per inch; a 3.0 mm stitch is 8.5. Write both numbers in the tech pack, or write one and state the unit. Main body seams on 600D run at 3.0-3.5 mm (7-8.5 SPI). Strap anchors, handle roots and base joins run at 3.5-4.0 mm (6.5-7.5 SPI) with a heavier thread. Binding and pocket edges can run at 2.5-3.0 mm (8.5-10 SPI) because the load there is low and a finer stitch looks better.
Thread size, needle size and point type
Thread is normally specified by ticket number or Tex. T70 bonded polyester is the general-purpose choice for bag bodies and pockets; T90 suits straps, handles and anywhere a seam carries a lifted load; T135 belongs on base panels and trolley brackets. The needle has to match both the thread and the cloth: a size 16-18 needle for 600D with T70, a size 18-20 for 1680D with T135, and a size 14 for lightweight lining. Point type matters on coated fabric. A sharp point cuts the coating and starts a tear; a round or light-ball point pushes between yarns instead. On waterproof panels, the needle also determines leak size, which is why seam sealing and stitch density are specified together.
Seam allowance, backstitch and bartack
A 10 mm seam allowance is standard on bag bodies, widening to 12-15 mm where the seam is pressed open or bound. Every structural seam needs either 10 mm of backstitch or a 10-15 mm overlap into the following seam; a seam that simply stops is a seam that will open. Bartacks belong at every point where a strap, handle, D-ring or leg bracket attaches, and at the ends of every zip opening. A 42-stitch bartack or a box-X pattern is normal on a strap anchor; a single row of straight stitching there is a defect waiting for a warranty claim.
Where Seams Fail on a Golf Bag
Seam failures are not evenly distributed around a bag. They cluster at load concentrations and at transitions between materials, and knowing the cluster points is what makes an inspection plan efficient.
| Seam position | Dominant load | Typical failure | Specification that prevents it |
|---|---|---|---|
| Strap anchor to body | Lifted bag weight, repeated | Bartack pulls out, thread cuts fabric | Box-X bartack, T90 thread, 12 mm allowance, reinforcement patch |
| Handle root | Single lift, 15-25 kg | Seam opens at the end of the stitch line | 10 mm backstitch, double row, T90, 3.5 mm stitch |
| Base to body | Ground contact, abrasion, water | Abrasion through thread, wicking at stitch holes | T135, 6.5-7 SPI, bound or taped seam, reinforced corners |
| Pocket gusset | Opening and closing, flex | Thread break at the gusset fold | 3.0 mm stitch, rounding at corners, no stitch into the fold |
| Top collar | Club entry abrasion | Stitch wear from shafts | Double row, 3.0 mm, thread with high abrasion resistance |
| Zip end | Pull force, repeated | Zip tape separates from panel | Bartack across tape, 10 mm overlap, T70 minimum |
Two of these positions deserve extra attention because they are structural rather than cosmetic. The strap anchor carries the entire weight of a loaded bag every time it is lifted, and a stand bag is lifted dozens of times per round. The base seam carries the bag plus clubs plus whatever is in the pockets, and it does so while sitting on wet grass and concrete. A programme that spends its quality budget on visible top-stitching and ignores these two seams has optimised the wrong end of the product.
Check the anchor, not the logo. When a returned bag arrives with a torn strap, cut the anchor open before deciding the cause. If the bartack is intact and the fabric has torn around it, the reinforcement patch was too small. If the bartack has pulled out cleanly, the stitch count or thread size was wrong. If the thread is cut mid-length, a sharp needle or a burr on the needle plate did the damage. Three different fixes, one look.
Material transitions are the other cluster. A seam that joins 600D body cloth to a PU trim, or a coated panel to an uncoated lining, has two different elongation behaviours under the same stitch line. The stiffer side takes the load, the softer side stretches, and the thread sees a shear it was not sized for. Adding a 10 mm stay tape or a lightweight interfacing at the transition costs almost nothing and removes most of that shear.
Setting Up a Sewing Line for Repeatability
A stitch count is only repeatable if the machine is set up the same way on every shift. Most drift comes from three sources: a changed needle, a changed thread lot, and a tension adjustment made to fix a different problem. The routine below closes all three.
- Fit a new needle at the start of every shift and record the size and point type on the machine card.
- Check thread path and bobbin tension against a master sample, then set the upper tension so the knot sits inside the fabric, not on the surface.
- Set stitch length with a gauge rather than by eye, and lock the dial.
- Run a 200 mm test seam on the actual production fabric and count stitches over 50 mm; record the number.
- Sew the first complete piece and hold it for approval against the seam table before the line runs.
- Patrol every two hours with five pieces, checking stitch density, seam allowance, backstitch and bartack presence.
- Log every needle change, thread lot change and tension adjustment with the time and the operator initials.
Walking-foot machines are worth naming here because coated fabric is slippery on the underside and tends to shift between the needle and the feed dog. A compound feed or walking foot keeps the layers moving together, which is what stops the 1-2 mm seam allowance drift that shows up later as a wavy pocket. On curved seams around a pocket gusset, a post-bed or cylinder-arm machine gives the operator visibility and control that a flatbed cannot.
Needle heat is an underrated cause of defects on coated cloth. At 3,000 stitches per minute a needle can reach 100°C or more, which softens PU coating and produces a stiff, shiny stitch line that later cracks. Lower speed on coated panels, a needle cooler, or a needle with a coating designed for synthetics all help. On a waterproof bag, that heat damage is also a leak path that no amount of seam tape will fully close.
In-Process Checks: First Piece, Patrol, End of Lot
Final inspection catches what has already been made; in-process checks stop it being made. The three checkpoints below are the minimum for a bag line, and each has a different purpose.
The first-piece check is the specification check. The first complete unit of a lot is measured against the seam table: stitch density in three places, seam allowance at four points, backstitch length, bartack presence and placement, and thread colour against the approved card. Nothing moves until that piece is signed. This is where a wrong bobbin or a mis-set stitch length is caught, at a cost of one bag rather than a thousand.
The patrol check is the drift check. Every two hours, five pieces come off the line and are checked for the same parameters plus visual defects. The point is not to find a bad bag but to detect a trend: three consecutive pieces at 7.0 stitches per inch when the spec says 8.0 is a machine drifting, and it will be at 6.0 by the end of the shift. Recording the number, rather than a pass or fail, is what makes the trend visible.
The end-of-lot check is the conformance check. It combines the patrol data with a full visual inspection and feeds the AQL sampling that decides whether the lot ships. If the first two checkpoints are working, this one should be boring, and a boring end-of-lot check is the sign of a controlled line.
The Visual Defect Catalogue
Stitch density is measurable, but half of what an inspector rejects is visual. Agreeing the list below, with photographs, before the first lot is the single most effective way to shorten an inspection argument.
- Skipped stitches, where the needle fails to form a lock and leaves a gap in the seam.
- Puckering along the seam line, usually tension or feed differential rather than stitch count.
- Seam allowance outside ±2 mm of the specified width, or uneven along the length.
- Missing or short bartack at a strap, handle, D-ring or zip end.
- Backstitch shorter than 10 mm at the end of a structural seam.
- Thread breaks, fuzzy thread or a splice within a visible seam.
- Needle cuts, where a sharp point has sliced the coating or the yarn beside the stitch line.
- Oil or dye marks transferred from the machine, needle bar or operator hands.
- Seam run-off at a corner, leaving a gap between two seam lines that should meet.
Classify each of these before inspection starts. A skipped stitch in a decorative top-stitch is minor. A skipped stitch at a strap anchor is critical, because it removes a load path. A 3 mm allowance deviation on a pocket is minor; the same deviation on a base seam can leave too little material for the binding and create a leak. The classification, not the defect name, is what determines whether a lot is accepted.
Testing Seam Strength and Durability
Lab testing exists to confirm that the specified seam actually performs, and to give a number when a dispute arises. Three tests cover most of what matters on a bag.
| Test | What it measures | Typical requirement | When to run |
|---|---|---|---|
| Seam strength, grab method | Load at which a sewn seam fails | 80% or more of the fabric grab strength | New seam, new thread, new fabric |
| Tear resistance beside seam | Whether the seam line starts a tear | No tear propagation at working load | Stress seams and base joins |
| Bartack pull-out | Load at which an anchor releases | Anchor holds 2x the rated carry load | Strap, handle and leg bracket anchors |
| Flex and abrasion | Wear at a repeated fold or rub point | No thread failure after 5,000 cycles | Handle root, pocket gusset, base corner |
| Seam leakage | Water passing through stitch holes | No droplet at 1 m head, 30 minutes | Waterproof models, all seam types |
Seam efficiency is the number to quote in a tech pack, because it is independent of fabric weight. A seam that reaches 80-85% of the grab strength of the cloth is doing its job; below 70% the seam has become the weak point and the design should be revisited rather than inspected harder. Running the grab test on both the fabric and the sewn seam gives that ratio directly.
Finished lots are then sampled at AQL 2.5, using the tables in ISO 2859-1, with the defect list anchored to the structural seams. Critical typically means an open seam longer than 25 mm, a missing bartack at an anchor, or a base seam with an unsealed gap. Major covers allowance deviation beyond ±3 mm, thread breaks in a visible seam, and needle cuts. Minor covers cosmetic puckering and oil marks that clean off. Writing these three tiers into the inspection plan is what turns a subjective argument into a count.
The quality standards guide sets out how these checks sit inside a full inspection routine, and the durability test on stand bags shows how seam performance translates into field life.
Training, Needle Discipline and the Cost of Rework
Rework is the most expensive defect in sewing, because opening a seam leaves needle holes that cannot be closed, and a repaired panel is never quite as clean as one sewn correctly. On a coated fabric the holes are permanent, and on a waterproof panel they are leaks. The cost of a reworked seam is therefore not the ten minutes of labour but the downgraded panel and, on a visible face, a second-quality bag.
The cheapest control is operator training tied to the seam table rather than to a generic skill level. An operator who knows that the strap anchor needs a box-X bartack in T90 at 3.5 mm, and who has the sample in front of the machine, produces conforming work without supervision. An operator working from memory produces what the previous style required. Short daily checks of the first piece, posted at the machine, keep that knowledge current through style changes.
Needle discipline is the second cheap control. A needle that has sewn 8,000 stitches is no longer the needle that was specified: the point dulls, the scarf wears and the likelihood of a skipped stitch or a needle cut rises. A planned change every shift, or every 4,000-6,000 stitches on heavy material, costs a few cents and removes a whole defect category. Recording the change on the machine card also makes it possible to trace a bad lot back to a worn needle rather than to the operator.
Sampling a new bag style runs 6-10 working days once the tech pack is agreed, and a new development with dedicated fixtures takes 500 pieces as a minimum with 12-15 working days added for tooling. Trial orders of 100 pieces are used to prove a seam table before a larger commitment. QUANZHOU JUNYUAN BAGS has sewn bags since 2014, with a team in the trade since 2004, and the seam table is treated as a controlled document rather than a note on the style sheet. Settlement runs on T/T 30/70 against documents, and quotes are issued FOB Xiamen.
A stitch count is a small number, easy to overlook and easy to check. That combination is exactly why it belongs in the specification. Written down, it becomes the difference between a seam that carries a bag for eight seasons and one that opens in a car park on a Saturday morning.
Next steps: custom solutions, manufacturing capability, and a quotation request. Waterproof coating and PU lamination. 600D vs 1680D polyester fabric.
Sources and Standards Referenced
- ASTM D5034 Breaking strength and elongation of textile fabrics (grab test)
- ASTM D2261 Tearing strength of fabrics by the tongue method
- ISO 2859-1 Sampling procedures for inspection by attributes
- ISO 9001 Quality management systems
- ISO 105-B02 Colour fastness to artificial light
Frequently Asked Questions
How many stitches per inch should a golf bag seam have?
Body and pocket seams on 600D polyester run at 7-8.5 stitches per inch, which is a 3.0-3.5 mm stitch length. Strap anchors, handle roots and base joins use 6.5-7.5 per inch with a heavier thread. Binding and light lining move up to 8.5-10 per inch. The number should be written per seam position, because a single figure for the whole bag is either too dense on heavy panels or too loose on light ones.
Is a higher stitch count always stronger?
No. Strength peaks and then falls. More stitches spread the load, but each one cuts yarn and coating, and beyond about 10 per inch on 600D the seam line becomes a perforated tear strip. Seam efficiency typically peaks at 8-9 per inch on medium-weight bag cloth. On lightweight lining the peak sits higher, and on 1680D base material it sits lower, around 6-7 per inch.
What thread size is used for golf bag seams?
T70 bonded polyester covers body panels and pockets, T90 covers straps, handles and anything lifted under load, and T135 covers base panels and trolley brackets. Bonded thread resists abrasion and UV far better than soft thread, and it holds tension through the needle. Match the needle to the thread: size 16-18 for T70 on 600D, size 18-20 for T135 on heavy base cloth.
Why do seams pucker on coated fabric?
Puckering is usually a feed problem rather than a stitch count problem. The coating is slick, so the top layer shifts against the bottom and the seam draws in. A walking foot or compound feed keeps the plies together. Too much upper tension, a blunt needle, or a stitch that is too short for the fabric weight will all add to it. Check tension on a scrap of the actual production fabric, not on a plain woven offcut.
How is seam strength measured?
The standard approach is a grab test on the sewn seam, then comparison against the same test on unsewn fabric. The ratio is the seam efficiency, and 80-85% is a healthy result on bag cloth. A separate bartack pull test measures the anchor rather than the seam. Both are destructive, so they are run on the sample and on a specimen cut from the first bulk lot, not on every bag.
What is a bartack and where does it go?
A bartack is a dense, short run of zigzag or box-X stitching used to reinforce a point of concentrated load. On a golf bag it belongs at every strap anchor, handle root, D-ring tab, leg bracket and zip end. A 42-stitch bartack is typical, and it should sit over a reinforcement patch where the fabric is light. A strap anchor without a bartack will pull out under repeated lifting even if the main seam is perfect.
How often should the sewing line be checked?
First piece of every lot, then a patrol check of five pieces every two hours, then a full end-of-lot inspection. The patrol should record the actual stitch count over 50 mm rather than a pass or fail, because a drift from 8.0 to 7.0 per inch is visible as a trend long before it becomes a reject. Any needle change or thread lot change triggers an extra first-piece check.
Do needle holes make a waterproof bag leak?
Yes, and that is why waterproof seams are taped. An untaped stitch line leaks at roughly 300-600 mm of water head regardless of the panel rating, because each hole is a continuous path through the barrier. Tape or seam sealant closes those paths. Stitch density affects hole count, so a waterproof panel is usually specified at 8-10 per inch and then taped, rather than sewn loosely to reduce holes.
What causes skipped stitches on 600D polyester?
The common causes are a blunt or wrong-point needle, a needle that is too small for the thread, incorrect timing between needle and hook, or too much tension pulling the loop out of the scarf. Coated fabric adds heat: a needle running hot at high speed softens the coating, which then drags and distorts the loop. Slow the machine, change the needle, and check the thread path before adjusting tension.
How do you inspect a seam at final AQL?
Final inspection applies AQL 2.5 under ISO 2859-1 to the lot, with defects split into critical, major and minor. Critical covers an open seam over 25 mm, a missing bartack at an anchor, or an unsealed base seam. Major covers allowance beyond ±3 mm, visible thread breaks and needle cuts. Minor covers cosmetic puckering and cleanable marks. Photographs of each defect class remove most of the argument at the inspection table.
What seam allowance is standard on a golf bag?
10 mm on body and pocket seams, widening to 12-15 mm where the seam is bound, pressed open or carries load. Base joins and strap anchors benefit from the wider allowance because it gives the bartack and the reinforcement patch somewhere to sit. Tolerance is normally ±2 mm, and it is worth inspecting, because a 7 mm allowance where 12 mm was specified leaves too little material to bind.
Can a bad seam be repaired without a visible mark?
On uncoated lining, often yes: the seam is opened, re-sewn on the same line and the holes close in washing. On coated or laminated fabric, no. The needle holes remain, and on a waterproof panel they leak. That is why rework on a coated bag is treated as a downgrade rather than a repair, and why the first-piece check matters more on coated styles than on any other construction.
Request a Seam Specification
Send the style and load points, and a seam table with stitch length, thread size, needle type and bartack positions comes back within two working days.
Get a Seam Table See Custom Solutions