Golf Bag Divider Manufacturing: How 14-Way Inserts Are Built
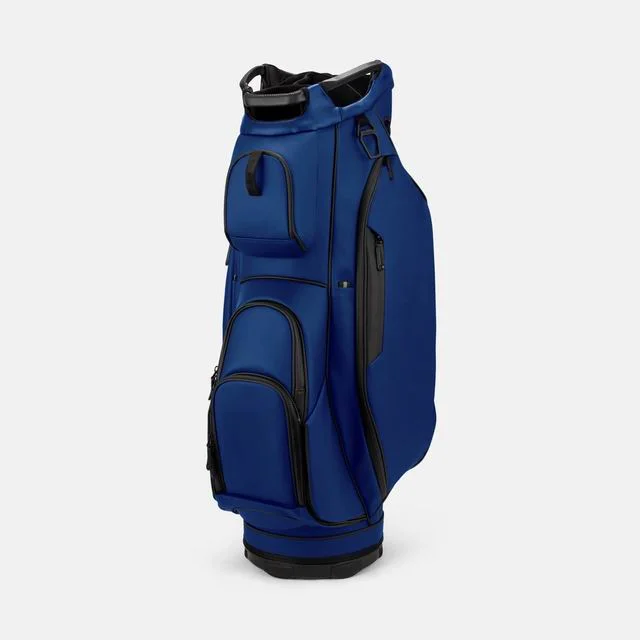
A 14-way golf bag divider is the insert that splits the top opening into fourteen separate club wells, and how it is built decides three things buyers notice immediately: whether grips tangle, whether the top still holds its shape after a season of use, and how much the bag weighs empty. Production splits into two families. A moulded polypropylene grid is dropped into a sewn fabric top, or fabric walls are stitched directly to a fabric panel. The moulded route carries tooling cost but holds dimensional tolerance; the sewn route is cheaper at low volume but sags under load. On the programmes we run, MOQ is 200 pieces per colourway with 100-piece trial orders, sampling takes 6-10 working days, bulk runs 35-50 days, and inspection follows AQL 2.5 under ISO 2859-1.
Related reading: Golf Bag Top Collar Construction: Carbon Fiber vs Plastic
What a 14-Way Divider Actually Does
The number fourteen is not arbitrary. Under the USGA Rules of Golf, Rule 4.1b limits a player to fourteen clubs during a round. A 14-way top mirrors that limit one well per club, which is why it became the default specification for cart bags and premium stand bags in the North American and European markets. What the marketing material rarely explains is that "14-way" describes the number of openings at the top, not the number of walls running the full depth of the bag. Those are two different engineering decisions with very different cost and weight consequences.
A divider has four jobs. It separates grips so they do not abrade each other in transit and in the cart. It holds each club at a predictable angle so the head does not foul the shaft next to it. It stiffens the top opening, which is the single most loaded area of the bag because every club is inserted and withdrawn through it. And it contributes to the bag standing or sitting correctly on a cart, since the divider grid and the top ring behave as one structural unit. Get the divider wrong and the symptoms appear months later at retail: grips scuffed, top oval distorted, clubs dropping through into the body of the bag.
The distinction that matters commercially is full-length versus partial. A full-length divider runs from the top ring to the base plate, creating a true tube for each club. A partial divider stops 150-250 mm below the top, enough to keep grips apart where they bunch but not enough to guide a shaft all the way down. A true 14-way full-length grid means thirteen internal walls spanning roughly 800-850 mm of bag height. That adds 250-400 g and a meaningful amount of labour, which is why almost no production bag is specified that way.
The practical compromise used across the market is a 14-way top with three to five full-length dividers creating primary compartments, and short dividers subdividing the rest near the opening. That gives the visual and functional promise of fourteen separate slots while keeping weight in the 2.2-2.8 kg range for a cart bag and 1.6-2.0 kg for a stand bag.
When a brand asks for "14-way full length" we push back with numbers, because at MOQ 200 the weight penalty and the cost per unit both land directly on the buyer. A full-length configuration typically adds USD 1.80-3.20 per bag at the divider stage alone, before the knock-on effect on the base plate and the top ring thickness needed to carry thirteen wall junctions.
Field note. The most common specification error we see from first-time buyers is asking for 14 full-length dividers on a stand bag. The leg mechanism and the top ring on a stand bag are not designed to carry thirteen wall junctions plus a 5 kg club load, and the top oval deforms within a season.
Four Divider Constructions Used in OEM Production
Almost every golf bag divider on the market falls into one of four constructions. The choice is driven by volume, target weight, price point and how much the brand cares about tolerance consistency across colourways.
Moulded polypropylene grid
A single injection-moulded grid, typically 1.8-2.5 mm wall, dropped into a sewn fabric top and secured with adhesive plus a stitch line around the perimeter. Polypropylene is the default because it is cheap, tough at low temperature and welds well. Some premium programmes use glass-filled PP or a nylon blend for higher stiffness at thinner walls. Wall thickness below 1.8 mm starts to show rib cracking at the junction nodes after cyclic loading, especially if the gate position is wrong and weld lines land across a corner.
Tooling for a 14-way grid runs USD 3,500-9,000 depending on cavity count and polish, with 15-25 days for first article. That tooling is a one-time cost amortised across the programme, and it is tied to the top opening geometry. Change the oval dimensions and you need a new tool, which is why buyers should lock the top shape before committing.
Sewn fabric walls
Fabric walls, usually 420D or 600D polyester or nylon with a PU backer, stitched to a fabric top panel. The walls can be single-layer, doubled, or laminated with 2-3 mm EVA for padding. This is the cheapest route at low volume and the most flexible for short runs and unusual colourways, because there is no tool.
The weakness is dimensional stability. Fabric stretches, and a sewn wall under continuous club load will sag progressively. The sag is rarely visible at the top; it shows lower down as a bag that no longer holds its oval and as grips that begin to bind on insertion. A well-built sewn divider controls this with a rigid HDPE or PE board panel at the top, double-row lockstitch at the wall-to-panel junction and a bar-tack at each wall end.
EVA-laminated dividers
Fabric walls with 3-5 mm EVA foam laminated between two fabric faces. The foam deadens the noise of clubs knocking together, which matters for premium and tour-adjacent products, and gives the top a softer hand feel. It costs weight roughly 60-110 g over plain fabric walls and adds a lamination step, so it is usually reserved for mid-to-premium programmes.
Hybrid: moulded ring with fabric tubes
A moulded top ring or partial grid combined with fabric tube walls below. This is the most common construction on 14-way cart bags at the USD 90-160 retail level: the moulded portion gives a crisp top edge and consistent well geometry where the buyer sees it, while fabric lower walls keep weight and cost down.
| Construction | Tooling (USD) | Divider weight | Tolerance held | Best fit |
|---|---|---|---|---|
| Moulded PP grid | 3,500-9,000 | 180-280 g | High: ±1.5 mm wall position | Volume cart bags, 14-way premium |
| Sewn fabric walls | None | 120-190 g | Medium: ±3 mm, drifts over time | Low MOQ, short runs, colour tests |
| EVA-laminated fabric | Cutting dies only | 200-300 g | Medium-low | Quiet premium bags, tour styling |
| Hybrid ring + tubes | 1,200-4,000 | 160-240 g | High at top, medium below | Mid-market 14-way cart and stand |
There is a fifth option buyers sometimes request: a 14-way top with no internal walls at all, just moulded slots in a thick top ring. It photographs well and costs least, but it delivers none of the separation benefit beyond the first 40 mm. We treat it as a cosmetic configuration and price it accordingly.
How the Insert Is Built, Step by Step
The build sequence differs between moulded and sewn routes, but the control points are the same. Each step below is where a defect is either prevented or baked in.
- Pattern and CAD review. The top opening oval, wall positions, well diameters and the height of each wall are confirmed against the tech pack. Well diameter is normally 38-45 mm internal, sized so a standard grip plus a gloved hand clears without binding.
- Material cut. Fabric panels are cut on a CNC cutter or die. Warp and weft direction is marked, because a divider panel cut off-grain will stretch unevenly and pull the top oval out of shape.
- Lamination. Where EVA or PU foam is used, the foam and fabric are laminated under heat and pressure, then rested before cutting. Rushing the rest period is a common cause of delamination in transit through hot climates.
- Moulding. For a moulded grid, PP pellets are dried, injected, then the part is cooled in the tool long enough to avoid warping. Post-mould shrinkage on a grid this size is real; the tool is cut oversized to compensate.
- Assembly to the top panel. The grid or wall set is positioned on the top panel and fixed. Adhesive plus perimeter stitching is standard. The stitch line must be continuous around each wall root, not just the outer rim.
- Wall-to-ring junction. Each wall end is anchored to the top ring with a bar-tack or box-X stitch at 8-10 stitches per inch. This is the highest-stress seam in the whole bag.
- Insertion into the bag body. The assembled top is joined to the body shell, then the bag is turned and the lining finished. Any twist introduced here shows as a skewed divider when viewed from above.
- In-process inspection. Dimensional check against the drawing, visual check for adhesive bleed and stitch density, then a functional check with a 45 mm gauge inserted and withdrawn from every well.
A 14-way sewn divider assembly is typically 12-18 minutes of direct labour. The moulded route is faster at assembly, around 8-12 minutes, because the grid arrives as one part with consistent geometry, but it front-loads cost into tooling and moulding.
The step where most programmes lose time is step one. If the tech pack leaves the top oval undefined, or defines it only as "standard 14-way", the tool gets cut to the supplier default and the brand discovers at first article that the shape does not match the cart or the carry strap position they had in mind.
Tolerances, Weight and the Failure Modes Buyers Miss
Tolerance is where a divider programme is won or lost, because the divider interacts with the top ring, the body shell, the lining and the base plate. A 2 mm error at the top becomes a 6 mm error at the base once the bag is assembled and loaded.
| Parameter | Typical production tolerance | Why it matters |
|---|---|---|
| Top opening oval | ±2 mm on both axes | Cart cradle fit, strap anchor position |
| Wall position | ±1.5 mm (moulded), ±3 mm (sewn) | Club clearance between adjacent wells |
| Well internal diameter | 38-45 mm, ±0.8 mm | Grip binding on insertion |
| Divider height | ±3 mm | Top ring seating, lining tension |
| Colour match same lot | ΔE ≤ 1.0 | Panel-to-ring visual continuity |
| Colour match across lots | ΔE ≤ 1.5 | Repeat orders, retail shelf consistency |
The five failure modes
Seam pull-out at the wall-to-ring junction. The wall end takes the full insertion force of a club plus the bag load in a cart. Under-specified stitching here fails first, and it fails as a tear rather than a gradual wear. The fix is a bar-tack or box-X with high-tenacity thread and a reinforcement patch behind the junction.
Divider sag. Fabric walls creep under sustained load. A sewn 14-way with single-layer walls and no rigid top panel will lose 5-10 mm of oval height within a season. The fix is a PE board panel, doubled walls or a hybrid moulded ring.
Rib cracking on moulded grids. Thin sections and weld lines at corner nodes crack after cyclic loading. Below 1.8 mm wall this becomes likely; the fix is thicker ribs at the nodes, a gate position that moves weld lines away from corners, and a resin with adequate low-temperature impact strength.
Grip binding. The well diameter closes up after lining and lamination build-up. A design that measures 40 mm on the drawing can measure 37.5 mm assembled, which is enough to bind a midsize grip. Always specify the assembled diameter, not the cut-part diameter.
Adhesive failure at high temperature. Laminated dividers that sit in a car boot or a container in summer can reach 60-70°C internally. A hot-melt adhesive selected for room-temperature peel strength alone will creep. Specify a adhesive with a softening point above 90°C, or use a stitch line as mechanical backup.
Every one of these is testable before bulk. Our standard protocol on a divider programme is an 8 kg static load across the top for 24 hours, 1,000 insert and withdraw cycles with a 45 mm gauge in the four most-used wells, a 1 m drop test onto the base in three orientations, seam strength per ASTM D5034 with a 250 N minimum grab strength, and tear strength per ASTM D2261. Colour fastness to light is checked per ISO 105-B02 where the divider is a contrast colour that will be exposed to sun.
Why this matters commercially. A divider failure is a warranty event, not a cosmetic complaint. On a 200-piece run, a 2% failure rate is four bags, but the retail consequence is a batch recall conversation with your account. Test at first article, not at bulk.
MOQ, Sampling and Where the Cost Actually Sits
Divider cost is rarely the largest line in a golf bag BOM, but it is one of the most sensitive to volume because of tooling and because it drives downstream weight and structural decisions.
For a moulded 14-way grid, MOQ is realistically 200 pieces per colourway, which is the threshold at which the tool amortisation per unit becomes tolerable and the moulding run is efficient. Below that, buyers are better served by a sewn divider, or by a hybrid ring with a stock grid and a custom colourway. Trial orders at 100 pieces are workable on the sewn and hybrid routes. A brand-new top opening geometry requiring a fresh tool typically lands at 500 pieces minimum to justify the tool cost, unless the tool is charged separately and retained by the buyer.
Sampling runs 6-10 working days for a sewn or hybrid divider using stock materials, and 12-15 working days where a new injection tool is involved because first article has to be moulded, measured and often re-cut once. The sampling stage is where the tolerance decisions in this article get proven on a physical part before bulk. Bulk production is 35-50 days from sample approval, with the range driven by fabric lead time and colourway count rather than by the divider itself.
Inspection follows AQL 2.5 under ISO 2859-1 at general inspection level II, which is the standard sampling scheme for consumer goods with a tolerable defect level. In practice that means a 200-piece lot is sampled at 32 pieces with an acceptance number of 2 major defects. Divider-specific checkpoints sit inside that sample: assembled oval dimensions, wall position, stitch density, bar-tack presence, and a functional insert test in every sampled bag.
| Cost driver | Share of divider cost | How buyers move it |
|---|---|---|
| Material (resin or fabric) | 30-40% | Wall thickness, fabric denier, PU backer grade |
| Direct labour | 20-30% | Wall count, stitch density, junction reinforcement |
| Tooling amortisation | 10-20% | Volume, tool retention, number of colourways sharing one tool |
| Finishing and inspection | 10-15% | Contrast piping, logo plate, AQL level |
Writing the Divider Into Your Tech Pack
A divider specification that cannot be argued about at inspection is one that names measured values. Six fields eliminate almost all first-article disputes:
- Divider count and full-length count separately. "14-way, 4 full-length" is unambiguous; "14-way" is not.
- Assembled well diameter, with a stated gauge size used for the functional test.
- Wall construction and thickness: moulded PP at 2.0 mm minimum, or 600D PU-backed fabric with PE board top panel.
- Junction reinforcement: bar-tack or box-X, thread type, stitches per inch, reinforcement patch yes or no.
- Top ring material and finish, since the divider and ring are visually continuous and must colour match.
- Test protocol and acceptance values, referencing the standards you will hold the supplier to.
One more field is worth adding even though it is not standard: the target assembled weight of the top assembly, divider plus ring plus collar. It forces the weight conversation to happen at design stage rather than after the first sample arrives 300 g over target, which is the point at which a stand bag programme usually has to be redesigned.
If you are specifying a 14-way top for the first time, the fastest way to avoid the common traps is to send us the top oval drawing and the intended retail price band. We can tell you within a day whether the configuration you have in mind is achievable at that price, and which of the four constructions gets you there with the least weight. For the surrounding steps, our OEM and ODM process guide walks through what happens between tech pack and bulk.
Sources and Standards Referenced
- USGA Rules of Golf, Rule 4.1b (14-club limit)
- ISO 2859-1:2022 Sampling procedures for inspection by attributes
- ASTM D5034 Breaking strength and elongation of textile fabrics (grab test)
- ASTM D2261 Tearing strength of fabrics (tongue method)
- ISO 105-B02 Colour fastness to artificial light
Next steps: custom solutions, manufacturing capability, and a quotation request.
Frequently Asked Questions
How many clubs does a 14-way golf bag divider actually separate?
Fourteen wells at the top opening, matching the fourteen-club limit under USGA Rule 4.1b. Only three to five of those walls usually run the full depth of the bag. The rest are short dividers that separate grips near the opening without creating a full tube.
Is a 14-way divider better than a 6-way divider?
It depends on how the bag is used. A 14-way top reduces grip contact and makes it easier to see which club is missing, which suits cart bags and riders. A 6-way top with full-length dividers is lighter and gives each club more room, which is why many carry and stand bags still use 6 or 7 ways.
What is the difference between full-length and partial dividers?
A full-length divider runs from the top ring to the base plate and creates a true tube for each club. A partial divider stops 150-250 mm below the top. Fourteen full-length dividers add 250-400 g and roughly USD 1.80-3.20 per bag compared with a partial configuration.
What wall thickness should a moulded PP divider grid use?
A 1.8-2.5 mm wall is the normal production range. Below 1.8 mm, rib cracking at the corner nodes becomes likely after cyclic loading, particularly where weld lines land across a junction. Thicker walls add weight quickly because the grid has a lot of surface area.
How much does a 14-way divider weigh?
A moulded PP grid is typically 180-280 g, sewn fabric walls 120-190 g, EVA-laminated fabric 200-300 g, and a hybrid ring with fabric tubes 160-240 g. The divider alone can shift the finished bag weight by more than 150 g.
What is the MOQ for a custom 14-way divider?
MOQ is 200 pieces per colourway for a moulded grid, with 100-piece trial orders workable on sewn and hybrid constructions. A brand-new top opening geometry that requires a new injection tool typically needs 500 pieces to justify the tool unless the tool is charged separately.
How long does sampling take for a new divider?
Sampling runs 6-10 working days where stock materials are used. Where a new injection tool is required, allow 12-15 working days, because first article has to be moulded, measured and sometimes re-cut once before approval.
What causes grips to bind in a 14-way top?
Almost always assembled well diameter. A well specified at 40 mm on the cut part can measure 37.5 mm after lining and lamination build-up, which is tight enough to bind a midsize grip. Always specify the assembled diameter and test with a gauge.
Can a sewn fabric divider hold its shape long term?
Yes, if it is built correctly: doubled walls, a rigid PE or HDPE board at the top panel, and double-row lockstitch at the wall roots. Single-layer walls without a rigid panel typically lose 5-10 mm of oval height within a season.
What inspection standard applies to golf bag dividers?
AQL 2.5 under ISO 2859-1 at general inspection level II is the standard scheme. A 200-piece lot is sampled at 32 pieces with an acceptance number of 2 major defects. Divider checks inside that sample cover assembled oval dimensions, wall position, stitch density and bar-tack presence.
Which tests should a divider pass before bulk production?
An 8 kg static load across the top for 24 hours, 1,000 insert and withdraw cycles with a 45 mm gauge, a 1 m drop test in three orientations, grab strength to ASTM D5034 at 250 N minimum, and tear strength to ASTM D2261.
Does a moulded divider need its own injection tool?
Yes, and the tool is tied to the top opening geometry. Tooling costs USD 3,500-9,000 with 15-25 days to first article. Changing the oval dimensions means a new tool, which is why the top shape should be locked before tooling is released.
Request a Free Sample
Send your top oval drawing or tech pack and we will come back with a divider construction recommendation, weight estimate and tooling position within two working days.
Request a Free Sample See Custom Solutions