Golf Bag Top Collar Construction: Carbon Fiber vs Plastic
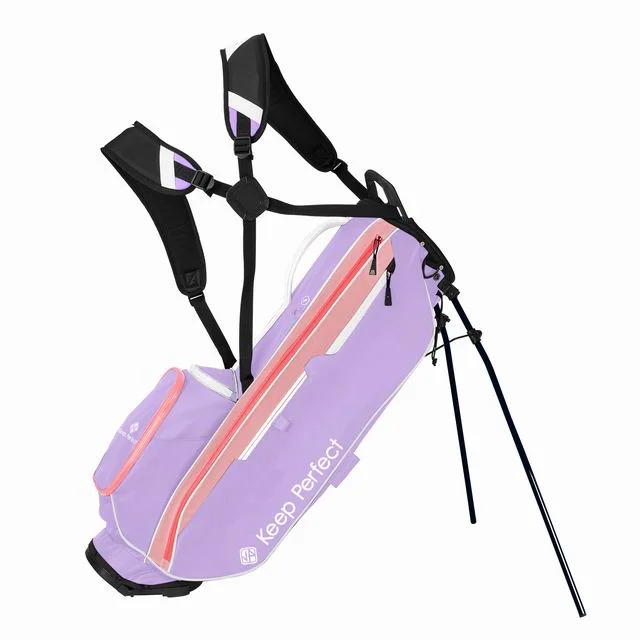
A top collar is the ring at the mouth of the bag, and in production almost nothing sold as carbon fiber is structural carbon fiber: it is a weave or a film laid over a moulded substrate, or a glass-filled moulding with a printed face. That distinction decides weight, tooling, warp risk and the price you pay at 200 units. The collar carries the divider grid, anchors every strap and, on a stand bag, takes the leg hinge load, so the material question is structural before it is cosmetic. Commercial terms barely move with the material: 200 units per colourway as the order floor, 100-unit trials where a tool already exists, 6-10 working days for samples and 12-15 where a new cavity is cut, 35-50 days of bulk, and AQL 2.5 inspection to ISO 2859-1.
Related reading: How a 14-Way Divider Is Built and Why It Seats in the Collar
What the Collar Actually Holds
Four different loads meet in one part. The collar defines the mouth oval, so it sets where the divider grid seats and how easily a club goes back in. It anchors the shoulder strap, the grab handle and the hanger loop. On a stand bag it also carries the leg hinge brackets, which is the highest point load anywhere on the assembly. And it forms the rim that a rain hood clips onto. A collar that is stiff enough for the first job but thin at the boss for the third is the most common specification failure on new stand bag programmes.
The load path explains the whole material hierarchy. A cart bag hanging from a storage hook by its hanger loop puts 8-12 kg through two rivet points and a 25 mm webbing loop. A stand bag resting on its legs puts the loaded weight of 6-8 kg through two hinge bosses at roughly 30 degrees of leverage. A collar measuring 2.5 mm at the rim can easily measure 1.8 mm at a boss, because the tool blends the boss into the rim for resin flow rather than for strength.
Club insertion is the repeated load, and it is the one that ages a bag. Fourteen clubs drawn and replaced at every hole across eighteen holes is close to 500 insertion events in one round, each applying a small downward force to the divider and a bending moment at the rim. Two seasons of that, rather than any single peak load, is what opens hairline cracks at the divider seats.
There is a fifth, quieter job: the collar hides the seam where the body shell, the lining and the divider all meet. That is why collar height is usually specified at 55-75 mm rather than the 30 mm the structure would need. Buyers who cut it for weight discover that the seam becomes visible from three metres away.
Three Constructions Sold as Carbon
Search the market for a carbon collar and most of what comes back is a finish, not a fibre. Splitting the offer into three production realities shortens the quotation stage considerably, because only one of them is priced like a composite part.
Moulded polypropylene with a carbon-look surface
The substrate is ordinary PP at 2.8-3.2 mm wall, injected in black, then finished two ways: a hydrographic water-transfer print that lays a 20-30 µm pattern over the part, or a 0.15-0.25 mm PVC or PET film wrapped and vacuum bonded. Tooling runs USD 2,200-4,000 with 15-20 days to first article, and the finished part weighs 95-125 g. Convincing at arm length, cheap by a wide margin, and the default at the entry price band.
Glass-filled nylon, moulded in colour
Thirty percent glass-filled PA6 or PA66 brings a real stiffness gain: roughly 2.5 times the flexural modulus of unfilled PP, at a density of 1.35 g/cm³ against 0.905. A 2.5-3.0 mm wall does what PP needs 3.2 mm to achieve. The part can be moulded in graphite or dark grey and left uncoated, which removes the film-lifting failure completely. Tooling costs more because glass-filled resin is abrasive and the cavity needs hardened steel: USD 3,200-6,000.
Real weave over a moulded core
A 3K twill sheet at 200-240 g/m², laminated with epoxy over an ABS or PP core and clear coated at 25-40 µm. This is the construction behind collars that genuinely show a weave under a fingernail. It adds 25-40 g to a plain moulded part and USD 5.50-9.80 per bag at 200 units, because each piece is hand laid, bagged and vacuum consolidated. Layup jigs cost USD 900-1,600 and do not replace the core tool.
Compression-moulded carbon and glass hybrid
Short-fibre carbon and glass in a resin mat, compression moulded in a heated steel tool. Stiffest per gram, and the only option where the reinforcement is genuinely structural through the full section rather than a skin. Tooling of USD 6,500-11,000 plus 25-30 days puts it beyond reach under roughly 500 units, which is why it turns up on staff bags and halo models instead of volume cart bags.
Weight, Stiffness and the Numbers That Matter
Buyers ask for weight first and stiffness second, but neither number means anything alone. A collar that saves 30 g and deflects 2.9 mm under load will show a visible gap against the body panel within a season; a collar holding 1.5 mm at the same weight justifies its tooling. Rank the constructions on both axes and the price conversation gets much shorter.
| Construction | Collar weight | Wall | Deflection at 8 kg | Tooling (USD) | Best fit |
|---|---|---|---|---|---|
| Moulded PP, printed or filmed | 95-125 g | 2.8-3.2 mm | 2.4-2.9 mm | 2,200-4,000 | Entry cart bags, high colourway count |
| Glass-filled nylon, moulded colour | 110-145 g | 2.5-3.0 mm | 1.6-2.1 mm | 3,200-6,000 | Mid and premium programmes |
| 3K weave over moulded core | 125-165 g | 3.0-3.4 mm total | 1.5-1.9 mm | core tool + 900-1,600 jig | Premium stand and staff bags |
| Carbon and glass hybrid, compression | 100-135 g | 2.2-2.6 mm | 1.1-1.5 mm | 6,500-11,000 | Halo models above 500 units |
Deflection in that table is measured with the part clamped at its base, an 8 kg load distributed across the mouth, and a dial gauge on the centre of the far rim read after 60 seconds. It is not a universal test, but it ranks constructions reliably, and it is worth naming in a tech pack so that a substitution can be rejected with evidence instead of opinion.
Weight distribution matters as much as the total. On a stand bag, moving 20 g from the collar to the base plate shifts the balance point, and leg geometry is tuned around that balance. Taking a collar designed at 105 g and finishing it at 145 g with a laminate is enough to make the legs feel slow to deploy, which is a complaint that lands on the brand and never on the supplier.
One more number buyers forget: the mouth oval is measured on the assembled bag, not on the moulding. Lining, binding and collar height tolerance all stack. If the drawing says 245 mm and the finished assembly measures 242 mm, the cart cradle fit and the divider seat both shift, so specify assembled dimensions and inspect the assembled part.
Cosmetic Carbon: Film, Hydrographic Print and Weave
Water-transfer printing is the cheapest convincing option and the easiest to identify up close: the pattern repeats across faces, the weave direction is identical everywhere, and part edges show a slightly thinner coat where the film stretched around the radius. A dip tank carries the part through an activated film, then a 20-30 µm clear coat goes on top. The step adds USD 0.85-1.60 per bag at 200 units and needs no new tooling.
Film wrap gives a deeper gloss and a more accurate twill, but it introduces an edge, and every edge is where lifting starts. In a container that reaches 60-65 °C internally in summer, a film bonded with a general-purpose pressure-sensitive adhesive creeps at the border within a single shipping cycle. Specify thermal bonding, or run the wrap line inside a stitch channel where it cannot be seen or touched.
Real weave is the only version that survives a fingernail, and even it depends on the coat. The clear coat is the wear surface: 25 µm scuffs to a dull patch where cart frames rub, 40 µm holds far longer. Yellowing is a function of the coat chemistry rather than the fibre, and it is testable. Light fastness assessed to ISO 105-B02 alongside the approved master swatch tells you in two weeks what a season outdoors would take a year to expose.
Conductivity is the detail almost no specification sheet mentions. Carbon conducts. An aluminium rivet or a zinc-plated screw seated directly against exposed weave forms a galvanic couple, and in a damp climate the aluminium becomes the anode: the head whitens, pits and eventually yields. Either isolate the fastener with a nylon washer and a coated shank, or run the entire hardware set in 304 stainless so the couple never forms.
Spec tip. Ask which face of the collar the weave runs on, and whether the pattern is continuous across the parting line. On a two-cavity tool the two halves rarely match at the join, and the mismatch is only visible once the parts are assembled and lit from the side.
Failure Modes That Appear After the First Season
Collar complaints almost never arrive in the first month. They arrive after a season of use, which means the cost is a warranty or a markdown, not a rework. The table below maps the symptom to the cause that produced it at design stage.
| Symptom | Root cause | Fix at design stage |
|---|---|---|
| Crack at the leg hinge boss | Boss wall under 3 mm with a sharp internal corner | 4.0 mm minimum boss wall, 0.5 mm radius, rib tying boss to rim |
| Visible gap against body panel | Warp from uneven cooling, or a rim that is too flexible | Fixture or water-bath cooling, flatness callout of 1.2 mm |
| Printed or filmed face lifting | Adhesive creep above 55 °C | Thermal bonding, edge tucked under a stitch line |
| Clear coat yellowing | Under-specified UV package in the coat | 40 µm coat with HALS additive, xenon-arc verification |
| Divider grid rattles | Mould shrink pulls the seat pocket off nominal | Cut the tool to the upper shrink limit, 0.3 mm interference |
| Hood clip loosens | Snap geometry sized to nominal only | Test the snap at both tolerance limits, 500 open and close cycles |
| White stress marks at corners | Demoulding before the part is cool | Extend cool time, polish draft faces, add ejector pads |
Shrink is the mechanism behind half of those rows. Unfilled PP shrinks 1.5-2.0 %, glass-filled nylon 0.4-0.8 %, and a laminate over a core does not shrink at all once cured. The tool is cut oversized to compensate, and the compensation is only correct if the moulder is running the resin grade named on the drawing. A resin substitution to save USD 0.20/kg can move the divider seat 0.4 mm and turn a quiet fit into a rattle.
Cold is the other test that separates constructions. A PP collar at -10 °C is roughly three times more notch sensitive than at room temperature; a glass-filled part much less so; a laminated skin can craze if the core and the skin contract at different rates. Conditioning samples at -10 °C for four hours and then dropping them 1 m onto concrete, three orientations, six samples, exposes the difference for the cost of an afternoon.
Fatigue at the divider seats is worth its own cycle test: a thousand insert-and-withdraw passes on the four wells nearest the handle, then a visual and a 5x loupe check at each seat. Cracks start at the seat corner where the wall meets the rim, and they are invisible to a buyer until the divider drops through.
Tooling, Minimums and the Cost Delta
The collar tool is married to one mouth geometry. Move the oval 8 mm on either axis and the cavity is scrap. That is why the oval has to be signed off before steel is cut, and why the divider grid and the collar are normally tooled as a pair so the two cannot drift apart on a later revision.
- DFM review. Wall thickness, draft, boss position, gate location and the shrink allowance are agreed against the divider drawing. Two days, and the step that decides whether the rest runs smoothly.
- Steel and cavity cutting. 15-25 days for a single cavity in hardened steel, longer where the surface is polished for a visible face.
- T1 shot. First parts are moulded, measured against the drawing and checked for warp on a surface plate. This is the shot most programmes need twice.
- Correction and re-spot. Gate, cooling or shrink compensation is adjusted; a second shot follows within 5-8 days.
- Cooling fixture and trimming. Parts are cooled in a fixture to hold the oval, then trimmed, deflashed and checked for flash at the parting line.
- Surface finish. Print, film, weave layup or moulded colour, depending on the construction chosen.
- Assembly and dimensional report. Collar, divider and hardware are assembled and measured as a unit, with the report issued against the drawing.
Sampling time follows the construction rather than the calendar. Where an existing tool is being re-coloured or printed, 6-10 working days covers material, print trial and one assembly. Where a new cavity is cut, allow 12-15 working days, because T1 has to be measured, sometimes re-spotted and run again before a first article can be signed. Bulk then takes 35-50 days from approval, driven by moulding slots and colourway count rather than by the collar itself.
Volume thresholds are simple. A moulded collar at 200 units per colourway is comfortable. A new oval geometry that requires fresh steel lands at 500 units unless the buyer pays for the tool separately and keeps title to it, which is often the better commercial answer for a brand planning three seasons on the same shape. A 100-unit trial is realistic only where the tool already exists and one colourway is being printed.
| Upgrade over a plain moulded collar | Added cost per bag at 200 | At 500 | Tooling |
|---|---|---|---|
| Carbon-look water-transfer print | USD 0.85-1.60 | USD 0.70-1.30 | None |
| Film wrap with UV clear coat | USD 1.10-2.00 | USD 0.95-1.70 | Wrapping jig USD 300-600 |
| 3K weave laminate over core | USD 5.50-9.80 | USD 4.60-8.20 | Layup jig USD 900-1,600 |
| Carbon and glass hybrid, compression | USD 11-18 | USD 8-14 | USD 6,500-11,000 |
The cost table makes the strategic point plainly. On a bag selling at USD 120 retail, a real weave adds close to 7 % to landed cost for a detail the buyer sees for two seconds on a rack. On a staff bag at USD 350, the same USD 8 buys a tactile difference that the account will notice. Match the construction to the price band rather than to the mood board.
Specifying the Collar in Six Lines
A collar specification that survives inspection names measured values and states where they are measured. Six lines close almost every argument that would otherwise arrive with the first bulk shipment.
- Mouth oval, assembled, in both axes, with tolerance, measured on the finished bag rather than on the moulding.
- Construction and wall thickness at the rim and at each boss, with a minimum rather than a nominal.
- Surface system named precisely: transfer print plus coat thickness, film plus bond method, or weave plus coat thickness and light fastness target.
- Rim flatness across the long axis, since this is what produces the visible gap against the body panel.
- Fastener specification including material and any isolation washer, which is what prevents galvanic attack on a composite face.
- Test protocol and acceptance values: static top load, insertion cycles, cold drop, and the sampling plan used to judge the lot.
The sampling plan is worth stating explicitly because it is frequently assumed rather than agreed. At general inspection level II under ISO 2859-1, a 200-unit lot puts thirty-two units on the bench and tolerates two majors. Collar checks inside that sample are the assembled oval, flatness, boss wall, surface defects, snap fit and colour against the master.
For the composite route there is one extra document worth requesting: a panel preparation and test record following ASTM D5687, which fixes how flat laminate coupons are prepared before mechanical testing. Without it, two labs can test the same material and report numbers that differ by 20 %, and the argument about whether a substitution occurred becomes unwinnable.
None of this is exotic, and none of it is expensive at the design stage. It is expensive afterwards. If a collar programme is being specified from scratch, send the oval drawing, the divider layout and the target retail band, and the construction question usually resolves in a day: which of the four options clears the price, and what it will weigh. Background on how the surrounding materials behave is in the materials guide, and the composite performance side is covered in the carbon fiber analysis.
Where the collar is going into a new stand bag, the leg bracket geometry and the collar boss should be designed together rather than sequentially. A bracket that arrives after the tool is cut will be mounted on whatever boss the mould happens to have, and that compromise is where the first warranty claim comes from. Collar programmes have been quoted under the QUANZHOU JUNYUAN BAGS name since 2014, on a team that entered the category in 2004.
Sources and Standards Referenced
- ASTM D5687/D5687M Guide for preparation of flat composite panels
- ISO 2859-1:2022 Sampling procedures for inspection by attributes
- ISO 105-B02 Colour fastness to artificial light
- ASTM D5034 Breaking strength and elongation of textile fabrics (grab test)
- ISO 9001 Quality management systems
Next steps: custom solutions, manufacturing capability, and a quotation request.
Frequently Asked Questions
Is a carbon fiber top collar stronger than a plastic one?
Usually yes, but not for the reason buyers assume. A real weave or a compression-moulded hybrid is stiffer per gram than unfilled polypropylene, so the rim deflects less under load. A printed or filmed PP collar, which is what most carbon-look parts actually are, performs exactly like the plastic underneath and gains nothing structural from the finish.
How much weight does a carbon collar save?
A 3K weave over a moulded core typically weighs 125-165 g against 95-125 g for plain moulded PP, so it usually adds weight rather than saving it. The genuine saving comes from a compression-moulded hybrid at 100-135 g with a 2.2-2.6 mm wall, which is 30-40 % stiffer than the PP part at similar mass.
What does a carbon-look finish add per bag?
A water-transfer print adds USD 0.85-1.60 at 200 units and needs no tooling. A film wrap with a UV clear coat adds USD 1.10-2.00 plus a wrapping jig at USD 300-600. A real 3K laminate adds USD 5.50-9.80 because each part is hand laid and vacuum bagged.
Does a carbon collar need a new mould?
Only if the mouth geometry changes. A laminate or a print can be applied over an existing moulded core, so the tool carries over. A new oval, a different boss layout or a switch to glass-filled nylon requires a new cavity at USD 3,200-6,000 and 15-25 days to first shot.
What wall thickness should a top collar use?
Unfilled PP needs 2.8-3.2 mm to hold the oval; 30 % glass-filled nylon achieves the same stiffness at 2.5-3.0 mm; a laminate over a core runs 3.0-3.4 mm in total. The dimension that matters most is boss wall, which should never fall below 4.0 mm at a leg hinge.
Why do top collars crack at the leg hinge?
Because the boss is blended into the rim for resin flow rather than for strength, so a part measuring 2.5 mm at the rim can measure 1.8 mm at the boss. The leg applies its load at roughly 30 degrees of leverage through that section. A 4 mm boss wall with a 0.5 mm internal radius and a rib to the rim removes the failure.
Will the clear coat yellow in sunlight?
It will if the UV package is under-specified. A 40 µm coat with a HALS additive holds colour far longer than a 25 µm decorative coat. Light fastness to ISO 105-B02, read against a retained grey scale, predicts the result in about two weeks of testing rather than a season outdoors.
How is the collar fixed to the bag body?
Most production collars are stitched through a binding at the rim, with adhesive locating the part first and rivets carrying the strap and loop loads. On composite faces the fastener must be isolated with a nylon washer or run in 304 stainless, because carbon conducts and will corrode an aluminium rivet in a damp climate.
What load should a collar survive in testing?
An 8 kg distributed static load across the mouth for 24 hours, a thousand club cycles with a 45 mm gauge on the four wells nearest the handle, and a 1 m drop in three orientations after four hours at -10 °C. Six samples per test is enough to separate a good construction from a marginal one.
What is the MOQ for a custom top collar?
200 units per colourway where a tool exists. A new mouth geometry that requires fresh steel lands at 500 units, or the buyer can pay for the tool separately and keep title to it. A 100-unit trial is workable only when the tool is already cut and one colourway is being printed.
How long does a new collar tool take?
Fifteen to twenty-five days for the cavity, then a T1 shot that is measured and often corrected, which adds 5-8 days. Allow 12-15 working days for sampling on a new tool against 6-10 where an existing collar is only being re-coloured, then 35-50 days of bulk after approval.
Can a scuffed carbon collar be refinished?
A printed or filmed face cannot be repaired invisibly; the part is replaced. A real weave with a clear coat can be lightly abraded and recoated, but the repair is visible under raking light and is only worth doing on a staff bag. Neither route is a retail-level fix, which is why coat thickness is specified up front.
Send Us Your Oval Drawing
Share the mouth geometry, divider layout and target retail price and you will get a construction recommendation with weight, tooling position and tolerance callouts inside two working days.
Send Your Drawing See Sampling Process